Determine Bootsettings from WinPE

Got an e-mail from a reader about booting into a buildshare, and part of troubleshooting required us to determine the share the bootimage was trying to phone home to.  I wanted to get a screenshot of how to get that info. It may be useful to you.

A boot image should have one and only one deployroot “share” declared. So different boot images will have different shares that they “phone home to”. From winPE you can determine the configuration from the bootstrap.ini variable from the commandprompt in winpe. Remember, you really only need to “update the share” when you’re messing with the boot settings.

From winPE, you hit F8 and a commandprompt will come up, you do a cd ‘change directory’ to x:\deployscripts and then open bootstrap.ini. This way you can determine where the bootimage is looking for the deployroot variable.


Boot
F8 will bring up a commandprompt in WinPE. It’s pretty handy, in this case, we see the boot ini.


Troubleshooting MDT (read your log files)

I was on the TechNet MDT forums the other day and I read somebody claiming that the MDT logfiles were too verbose and too hard to read. This is only kind of true. They certainly are verbose (which is in fact a good thing). These logs will contain lots of information, and while it can seem overwhelming at first, they’re only hard to read when you’re not using CMTrace. This is a free tool you can download from Microsoft. It’s part of the SCCMTooklit downloads available here:

download
https://www.microsoft.com/en-us/download/details.aspx?id=50012

When installing the SCCM2012R2 Toolkit, just select client tools.

CMTraceInstall
Pass on the ServerTools and Select Client Tools

Once that’s installed you may need to set CMTrace as your default viewer for logfiles. That’s easy. Open CMTrace once and it’ll ask to be the default. The hard part is knowing which log files to check.

CMDefault
CMTrace should ask you this right away – Select yes

Yes, sometimes knowing if half the battle, and with MDT that battle is knowing where to look for log files. If the imaging hasn’t started and you’re still in WinPE, look in X:\MININT\SMSOSD\OSDLOGS. If the task sequence has started and that PC has at least imaged, look in C:\MININT\SMSOSD\OSDLOGS. If the task sequence has finished, or at least been wrapped up cleanly, look in %WINDIR%\TEMP\DeploymentLogs. MDT will move everything there at the end.

The core MDT log file is BDD.log. MDT will dump that to the Windows temp folder on the system being imaged. If you don’t have server logging set up in your share, set that up. It’ll save you time down the road. It will let you dump logs back to MDT at the end of the deployment. There’s lots of logs for each script that runs as part of the task sequence and you can even specify to log MSI installs during the deployment as well.

logs
The first place to look when troubleshooting MDT is the BDD.log file in the windows temp.
bddonnotepad
This is your logfile in notepad. Not pretty. I’d even say this is practically useless
Trace32FTW
CMTrace allows you easily read MDT log files, it highlights warnings, errors and points out problems for you.

Other log files you may want to look for:

  • ZTIApplications.log – When troubleshooting application installs
  • ZTIDrivers.log – When troubleshooting MDT Driver injection
  • ZTIDomainJoin.log – When troubleshooting joining the domain

Finally, there’s a great guide here that reminds us the most important thing about troubleshooting MDT:

“When you know which log files to research for what failure condition and at what time, issues that were once mysterious and difficult to understand may become clear and understandable.”

https://docs.microsoft.com/en-us/sccm/mdt/troubleshooting-reference

For more info on Advanced MDT troubleshooting, check out Keith Garner’s guide on TechNet here:

https://social.technet.microsoft.com/Forums/en-US/ef0a9119-63b6-45ae-a871-866ea62ee3e8/mdt-technet-forum-faq-getting-started-guide?forum=mdt

Installing Adobe Acrobat Reader DC with MDT

Started doing some tests from my Deployment Shares in my home lab when I realized my Reader install was woefully out of date. Figured since I had to update it anyway, might as well make a quick little guide on how to install a customized ReaderDC 2018 with MDT.

First, you’ll need to download the reader executable, I prefer grabbing it from Adobe’s FTP site. Grab the latest DC builds here: ftp.adobe.com/pub/adobe/reader/win/AcrobatDC/

You may also want to look for the latest patch for it as well, they can be a little hit or miss, but it’s worth trying to see if you can get it to work. If you’re locked into a certain version, this can be particularly useful.

If you’re just learning or comfortable with simply installing the standalone executable, that’s easy. You’ll just add it into MDT with the /sAll switch and away you go. No need to unzip the file or create a transform.

However, if you need to install a specific build or customize the install in anyway, you’ll want to extract the executable with 7Zip or WinRAR, as you need both the msi to install from and to be able to generate a transform. This comes in handy when you need to disable upsell and cloud features your users may not want or need in a corporate environment.

If this is the route you’re interested in, you’ll want to first download the Acrobat Customization Tool. This will also let you point to a msi file, configure update settings, EULA stuff and even custom registry keys to disable stuff like the “welcome to reader” first launch stuff for your users, and then save a transform file.

Information on Adobe’s tool is available here: https://www.adobe.com/devnet-docs/acrobatetk/tools/Wizard/WizardDC/basics.html

I don’t recommend disabling the auto update feature, but in some environments, reader is patched from a SMS later after testing. It’s up to you.

Finally, you’ll need to know the unattended command line magic to string along the installer and transform with the update:

msiexec.exe /qb- /l*vx %LogPath%\AcroReadDC.log REBOOT=ReallySuppress UILevel=67 ALLUSERS=2 /i AcroRead.msi PATCH="\\MDT01\Share$\Applications\AdobeReaderDC\AdbeRdrUpd2018.msp" TRANSFORMS="AcroRead.mst"

Note the path requires a FQDN, point it to the server and share.

Quick Walkthrough:

Make Your Customizations to the MSI by opening it with the Adobe Customization Tool.

ACT
Unless you’re using the cloud services, you may want to disable them. Pass on ‘upsell’ as well.

Once you’ve saved the mst file, you’ll want to save it with the msi and msp files before uploading them into your share.

Files
The msi, the mst and the msp, Notice the date modified. The newest is the transform file.

Now that you’ve downloaded, extracted, and customized everything, import it into your share as a new application with source files.

DC01
Once you’ve unzipped the executable and generated a transform, import as app with source files.
DC02
Keep the Version Generic, you may have to update the package later.
DC03
Point it to the folder where your updates and transforms are with the msi you extracted from the executable.
DC04
You’ll want to point to the MSI, the patch (with the path) and the transform. 
msiexec.exe /qb- /l*vx %LogPath%\AcroRead.log REBOOT=ReallySuppress UILevel=67 ALLUSERS=2 /i AcroRead.msi PATCH=”\\MDT01\Share$\Applications\Adobe Reader DC\AdbeRdrUpd2018.msp” TRANSFORMS=”AcroRead.mst”
DC05
Either bundle Adobe into your build prior to capture, or deploy it dynamically.
DC06
Win10x64 1709 with AdobeReaderDC fully patched and customized.

Adding a customized install of Reader into your deployment shares takes some time, but with a little bit of trial and error you’ll be installing Reader “automagically” in no time. If you’re having trouble with the install make sure to check the logs in the temp directory.

As Johan says, “Happy Deployments!”


Update Your MDT Install!

Microsoft did quietly release an updated build 6.3.8450 last month to fully support Windows 10 1709 and to fix some known issues. If you haven’t updated, do that sooner rather than later. Remember, there’s no MDT 2012 or 2013 anymore, it’s just MDT plus the build now.

In the release notes you’ll see something interesting:
MDT8450
I’m assuming that’s a fix for Lenovos not identifying as Laptops I identified last year.

See: https://blogs.technet.microsoft.com/msdeployment/2017/12/21/mdt-8450-now-available/

And of course, Johan’s already got a guide on upgrading. https://deploymentresearch.com/Research/Post/660/A-Geeks-Guide-for-upgrading-to-MDT-8450

When was this computer imaged?

Had a fun question today. “Hey, When was this computer re-imaged?” Wasn’t sure if a co-worker did before he left for the day. Wasn’t sure if it had been reimaged or not.

Good thing MDT dumps that data to the registry during the state restore phase during the Tattoo step.

Look in:

HKEY_LOCAL_MACHINE\SOFTWARE\Microsoft\Deployment 4\Deployment Timestamp

TimeStamp

Yeah, Clonezilla ain’t doing that…

Joining the Domain with MDT

Somebody asked me the other day about joining to the domain with MDT, to which I replied, oh that’s easy.

Let’s take a dive:

The beauty of MDT over other “cloning” tools that I’ll leave nameless is that it’s more than just a disk cloning tool, it’s an entire OS deployment framework. All the scripts are written, you just add variables to an ini file and away you go.

A default standard client task sequence will join a PC to the domain, that’s why by default the LTI Wizard asks for all that information. You can tell the wizard not to ask and just do it “automagically” for you.

To automate your domain joins, there are four variables you’ll need to set in your customsettings.ini file; JoinDomain, DomainAdmin, DomainAdminDomain and DomainAdminPassword.

JoinDomain=yourdomainname.local
DomainAdmin=ServiceAccount
DomainAdminDomain=yourdomainname.local
DomainAdminPassword=P@$$WoRD12345!

It’s that easy. By default, the system gets joined to domain immediately and on first boot, it’s joined and ready to rock so it’ll grab group policies almost immediately. If you don’t have stupid group policies, it’s all downhill from here. If you have stupid group policies, you’ll have to modify your XML file and move the domain join to the very end of your task sequence like this.

Now, with that out of the way, what if you want to specify the OU? Well, there’s another customsettings.ini variable for that too, it’s MachineObjectOU.

MachineObjectOU=OU=yourouname,OU=computers,DC=yourdomainname,DC=local

And finally, if you’re having trouble joining the domain, you’ll be looking for ZTIDomainJoin.log. It’ll be in the %WINDIR%\TEMP\DeploymentLogs. For most of you, that’ll be C:\Windows\Temp\DeploymentLogs or your server side logs location if you have that configured as well, just use Trace32 to read them, because they’re pretty hard to decipher from notepad.

As Johan says, Happy Deployments!

Dynamically Picking Image From MDT

Johan Arwidmark, the MDT Guru extraordinaire posted a neat trick this weekend; Getting MDT to install a different image based on a dynamic variable. In his example, you could have ONE task sequence drop a different image based on location. I didn’t even know you could do this, so this is pretty cool.

I share his sentiments that usually you’d want to have a 1:1 for each TS to image, but in case you ever had a reason to do this, you could. I can already think of a couple of scenarios off hand where this could be pretty useful myself. Now, I haven’t tested this yet, but looking at what he’s showing here, it should work.

Check it out here: https://deploymentresearch.com/Research/Post/648/Dynamically-select-OS-Image-in-the-MDT-Lite-Touch-Task-Sequencehttps://deploymentresearch.com/Research/Post/648/Dynamically-select-OS-Image-in-the-MDT-Lite-Touch-Task-Sequence

Designing a Hybrid Image

For some time, thin images were all the rage, IT Pros were trying to keep images as thin as possible and let the applications get installed either as part of the next task sequence or from group policy. This was in response to the old school and monolithic images that had become prevalent over the prior decade. In the past, you’d just create one thick image, per model and roll that out with everything, regardless of whether the user needed all these applications or not.

I assert however that like most things in this world, the best solution fits somewhere close to the middle of two extremes. Organizations need a balance of time and of disk space. This solution is colloquially known as a hybrid image. It allows us to keep common applications in the image and then let the supplemental applications come only later to those who need them.

First things first; don’t build your images on physical hardware. I can’t tell you how many times I still get emails from people who do this. If you are building images on physical hardware like it’s 1999, you’re doing it wrong. Always, always, always build your image in a VM and capture it via standard client task sequences. This ensures your image runs on everything, laptops, desktops, tablets. Let MDT install drivers for you. It’s that whole rule of working smarter not harder at hand here.

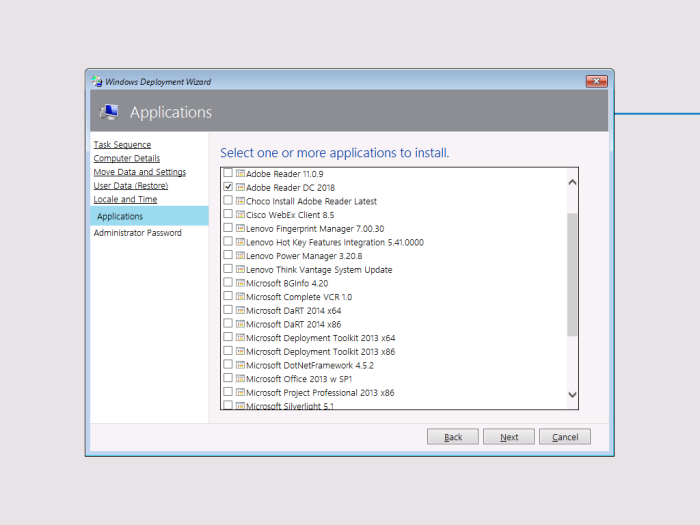
Next, build a hybrid image. Essentials like Office, Adobe Reader, and Some Core Line of Business Applications should go in your image. Leave Flash and Java and other commonly updated optional apps out of the image. The whole point of imaging is saving time, and while yes you can get MDT to drop a raw windows wim file and do the whole office and patching for you, this is not something you want to do repeatedly. You don’t need five dozen some PCs all pulling six month old office patches across a 40 meg connection across your WAN just because you can.

Fundamentally, it comes down to striking a balance between having a flexible deployment over a fast one, but with some work, you can have both.

There’s lots of ways this can be done. Applications can be installed by form factor. This could include rules your MDT ini that install VPN clients only on your laptops. Applications could also be installed by location, so that only desktops at a certain location get a certain program. This is also done by rules in the ini file based on gateway. Finally, you can also install applications based on the presence of specific hardware. Using some WMIC queries, conditions can be added to task sequences that install applications that are only needed when certain devices are plugged in.

That last example takes some work, you need to know the hardware IDs of the devices, and the devices would have to be standardized, but the point is that after some trial and error, You’re able to set up your imaging system to work for you, so that you can kick off a reimage, tell your user to go to lunch, and when they get back, they’re back to work, and you never get bothered again by them. Its truly a beautiful thing.

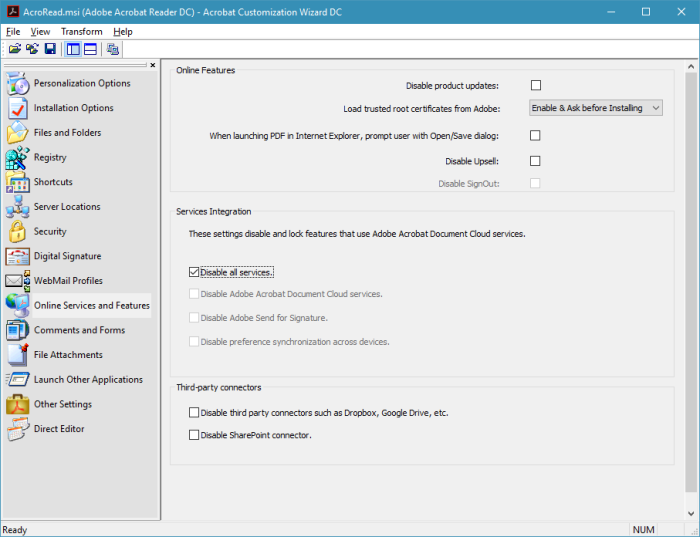
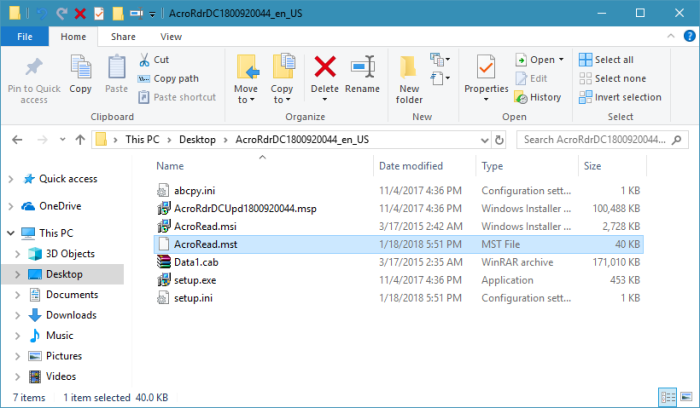
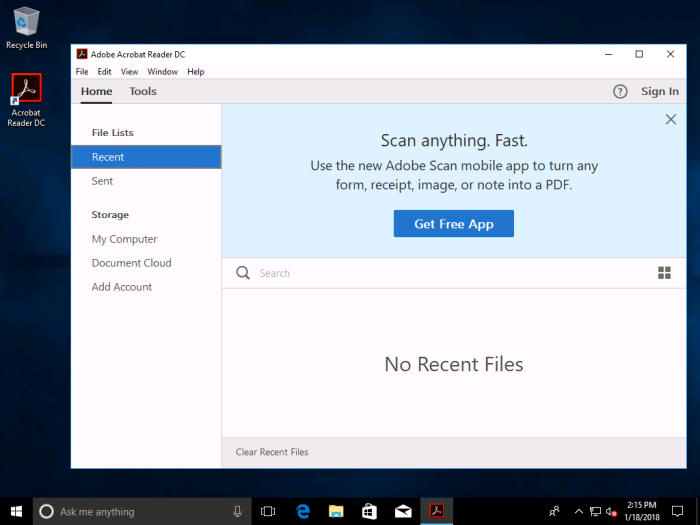
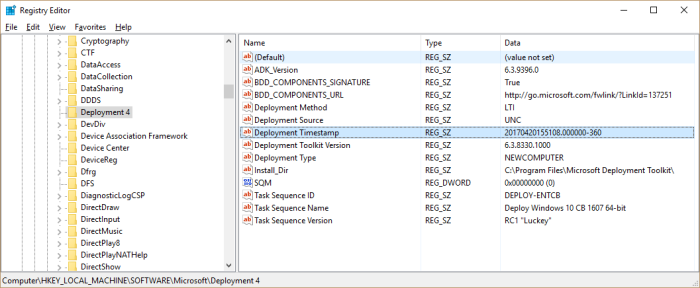
MDT can also be configured to detect and reinstall certain software during a refresh. During the gather phase, conditions can be set to create task sequence variables that would detect the install of software like Adobe Acrobat for instance. If MDT detects that Acrobat Pro is installed, the variable gets set and MDT will then install that application only on those PCs. The gotcha on this one is that the install has to usually needs to come from an MSI, but the framework exists, and could be used for any registry key if one wanted to go down that rabbit hole.

Build an image factory. Yes, this possibly one of the coolest things you can do with MDT. Some people don’t know this, but MDT is more than just an imaging system, its an entire automated systems deployment framework and as such it can be utilized to automate the entire image build process. This has allowed me to automate monthly builds of images, and keep our deployment times in the 25-30 min range.

ImageFactory

Setting wallpapers, start menus, and desktop icons can all be scripted, and I’ve blogged extensively on some of these techniques, but the idea here is more of using MDT to build the configuration for you so that you know that the image you create tomorrow is more or less identical to the image you made last quarter just this one is fully patched, and that’s truly working smarter not harder.

Questions? Comments? Reach Out to Me Here!

Editing The Registry With MDT

I was helping somebody understand how to edit the registry with MDT, which isn’t very intuitive or obvious to some, and I ended up diagramming the entire commandline syntax of an example, and I figured it might help somebody else, so we’ll walk through it step by step on the blog today. First, you need to know what registry key you’re trying to set: In this example, we’re setting the lock screensaver option. This can easily be done via the command prompt like so:

reg.exe add "HKCU\Control Panel\Desktop" /v ScreenSaverIsSecure /t REG_DWORD /d 1 /f

What’s going on here? Look below.

Part of the beauty of task sequences is anything that can be done via commandline can be done via a task sequence. Simply Add it as a command line in your task sequence.

This is especially helpful when building an image. By using a combination of this and a few other tricks, I have fully automated by windows 7 image build so the hardest thing I have to do is run a task sequence which in turn builds and captures an image for me.

See:
https://technet.microsoft.com/en-us/library/cc742162(v=ws.11).aspx
https://ss64.com/nt/reg.html

Ask MDTGuy: Adding Applications to MDT as .exe

Got an e-mail from a reader today about getting MDT to install a file as an exe.

In a perfect world, we’d all have MSI files to install software from because there is largely almost no guess work other than what paramaters to set if we need to. Sadly though, it is often the case with stand-alone exe files there is no documentation, and we’re playing the guess and check game.

Finding the magic switch to install software can be a real pain. The best thing to do is to try it on a PC first until you get it then add it to MDT. I like to copy the file to the desktop of a VM, snapshot it, and open a command prompt from within the folder. This is done easily by typing CMD into the address bar of the folder from explorer. This way you can nail it down first, then add it to MDT.

I usually start with the most obvious switches, /s, /q, -s or -q.

Sometimes however, you need to ask nicely and use /?, -?, /h or -h to get it to tell you what to do. This works more often than you think. It’s a way to ask the executable for help and in some cases it works, the package creator spent a few minutes leaving this behind for us sysadmins. For all the developers out there who do this, we salute you!

Microsoft installers are USUALLY pretty good about using /passive /norestart on stuff like dotNetFramework and other stuff, if all else fails, there is the googles. Usually putting in the name of the product or installer file name followed by silent or unattended will do the trick.

As Johan says, “Happy Deployments”!